🛠️ Worker Installation
Octo Worker is a Windows service that runs in the background and carries out scheduled tasks and integration jobs. This document explains step by step how to install the Worker in a new customer environment.
This page describes installing the Worker service on the server (sysadmin / DevOps). To define tasks for a running Worker (scheduled SP, report, mail trigger), see: Worker — Task Management
For a visual walkthrough of the installation process, you can watch the introductory video below.
📺 Introductory Video
The video is hosted on Renium SharePoint. To watch it, you must be signed in with your Renium account; if you are not signed in, the Microsoft login screen appears inside the iframe.
Prerequisites
- Administrator privileges on the Windows Server (or the machine where the installation will be performed)
- .NET Runtime (matching the version the Worker was built with)
- RMS (Remote Desktop Manager) connection details for accessing the Octo database
- SMTP / email notification settings (for error notifications)
Step 1 — Placing the Worker Package
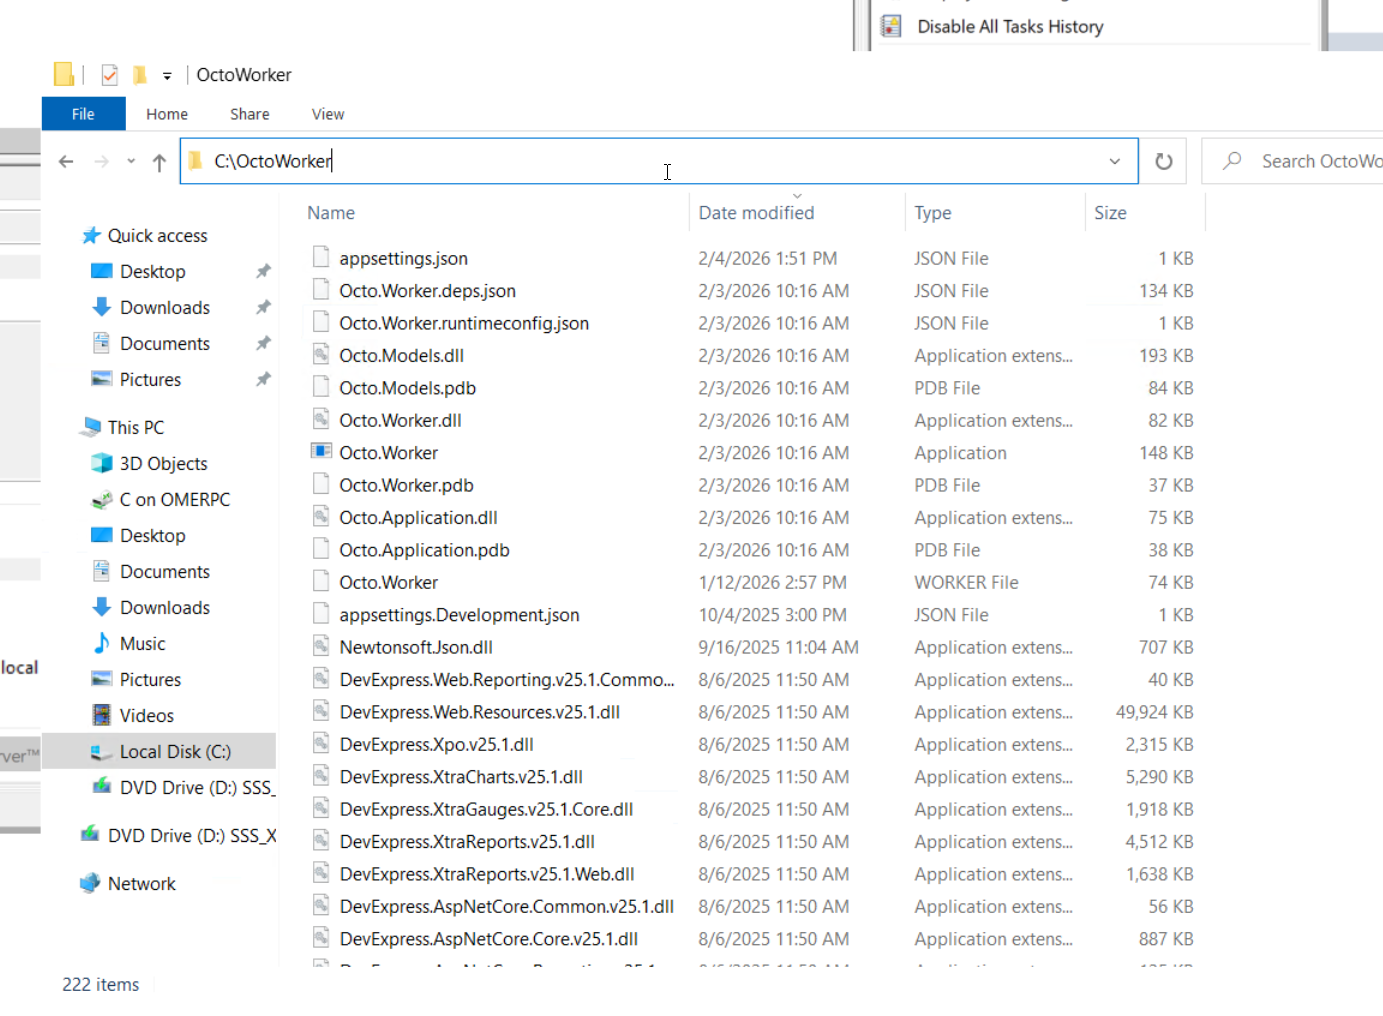
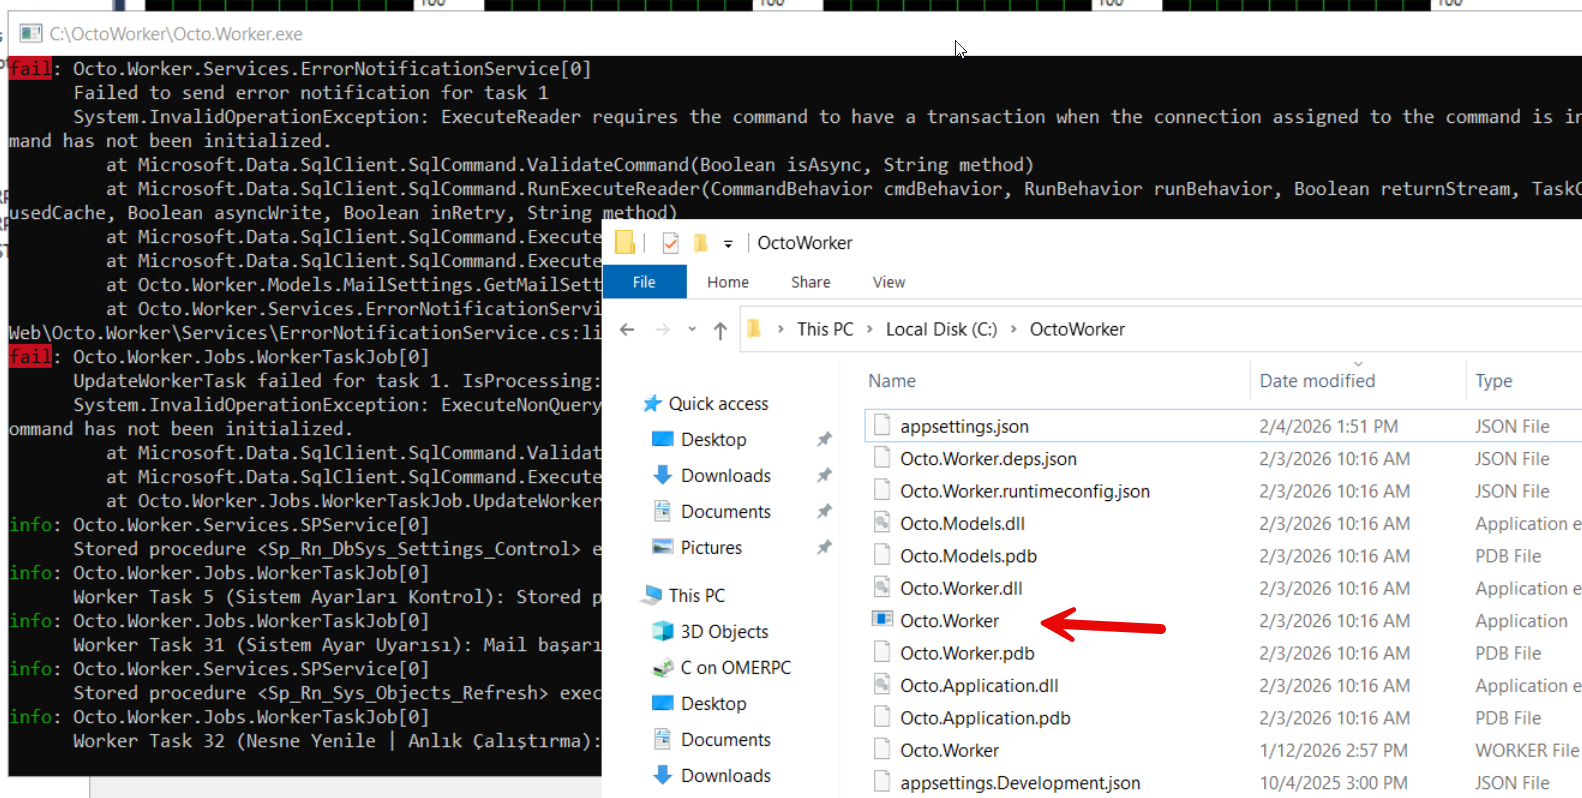
Extract the Worker release package into the C:\OctoWorker directory on the server. The folder should contain Octo.Worker.exe, appsettings.json, Octo.Worker.dll, and dependency DLLs (DevExpress, Newtonsoft.Json, etc.).
Step 2 — appsettings.json Configuration
Open the appsettings.json file and edit it according to the template below. Update the FirmaId, ConnectionName, and Recipients fields based on the installation.
{
  "Logging": {
    "LogLevel": {
      "Default": "Information",
      "Microsoft.Hosting.Lifetime": "Information"
    }
  },
  "FirmaId": "<FIRMA_ID_GUID>",
  "ConnectionName": "<CONNECTION_NAME>",
  "ErrorNotification": {
    "Enabled": true,
    "Recipients": "<MAIL_1>,<MAIL_2>",
    "FromAlias": "Octo Worker"
  }
}
FirmaId: TheIdvalue (GUID) of the company the Worker will connect to, from theTb_Rn_Sys_Companiestable. E.g.:"da28d5e8-a6c3-4130-53a6-08dd7db5ef9a"ConnectionName: The connection definition. This name must be defined in Octo connection management. E.g.:"OCTO_<MUSTERI_KODU>"ErrorNotification.Recipients: The addresses to which a warning email is sent when the Worker encounters an error (comma-separated). E.g.:"admin@firma.com,destek@firma.com"ErrorNotification.FromAlias: The sender name of the error email.
Step 3 — Creating the Task Scheduler Task (General)
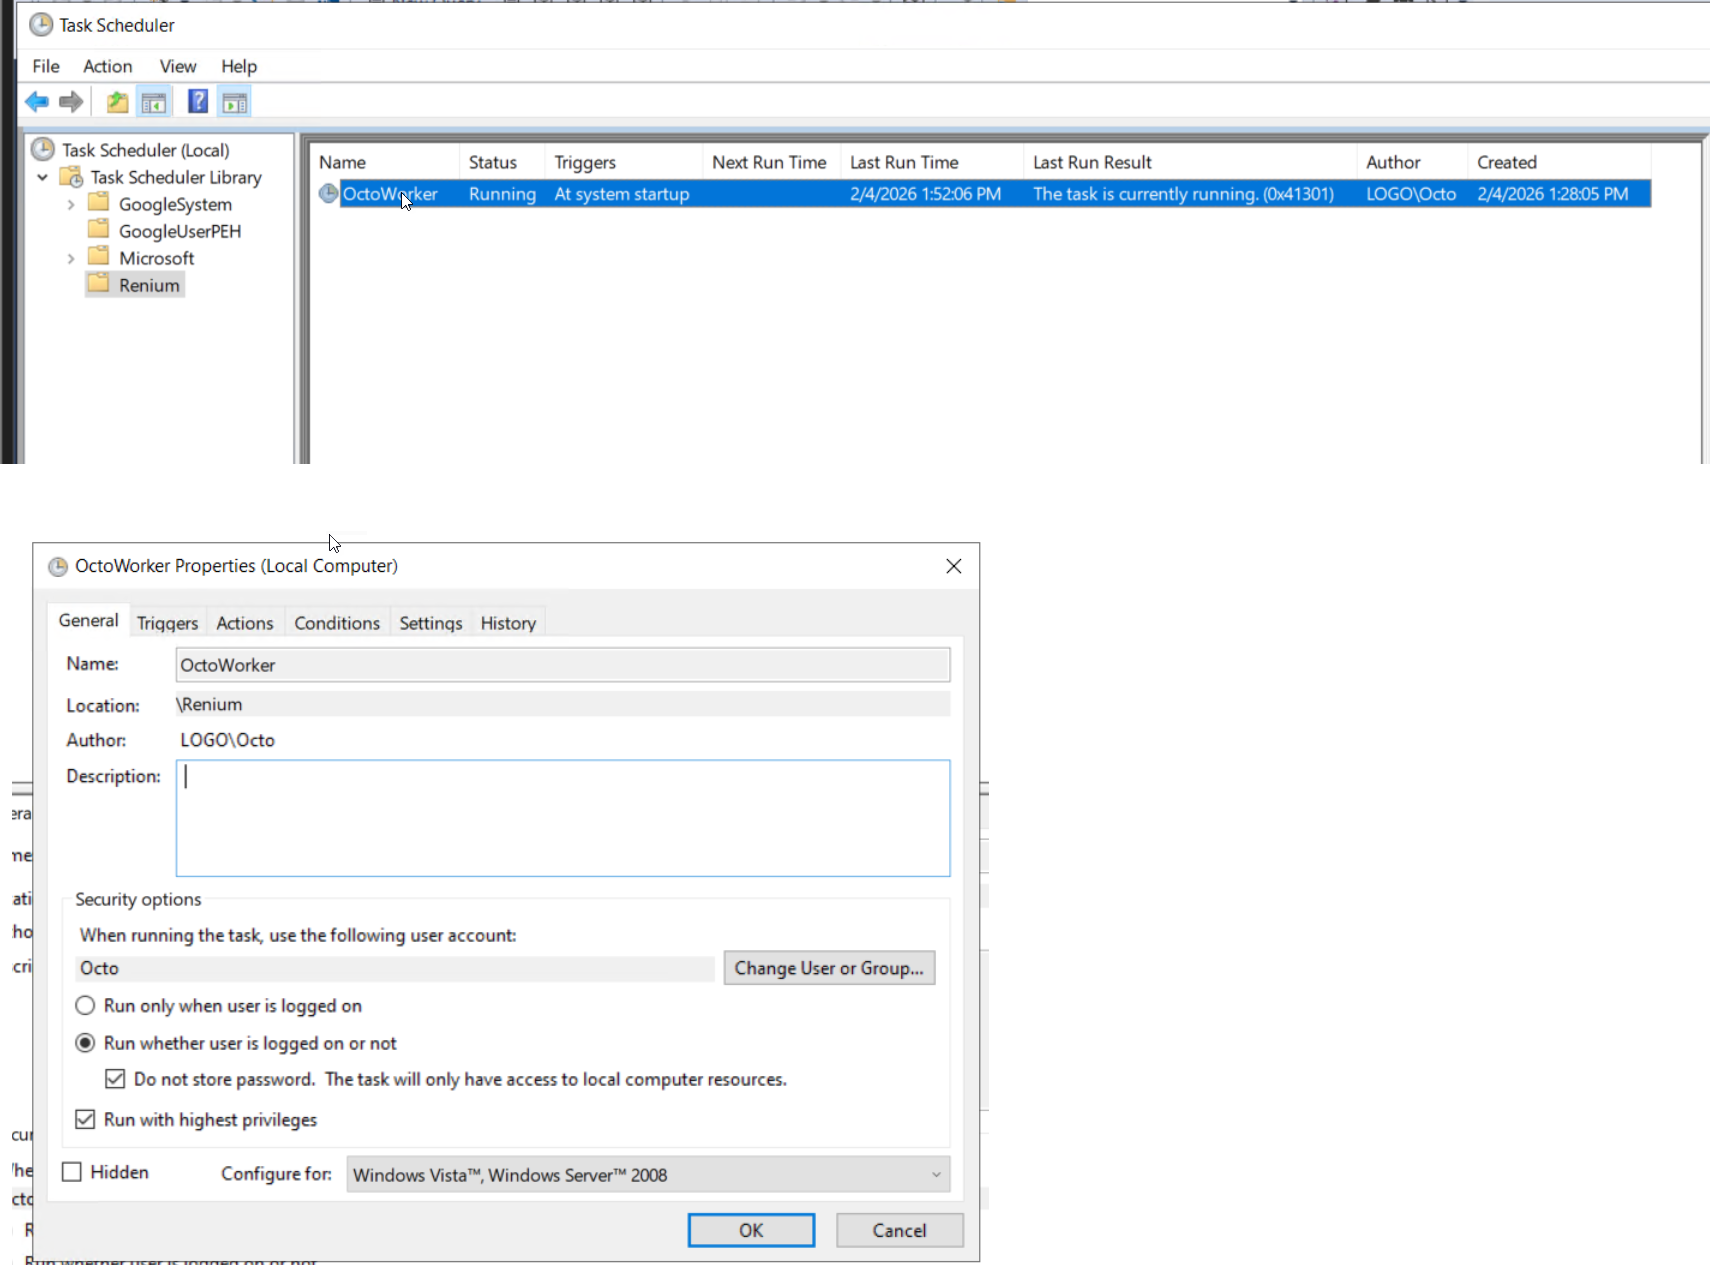
Open Task Scheduler → under Task Scheduler Library create a Renium folder → add a new task with Create Task. Save the task with the name OctoWorker and apply the security settings:
- Run whether user is logged on or not selected
- Do not store password checked
- Run with highest privileges checked
Step 4 — Trigger Definition
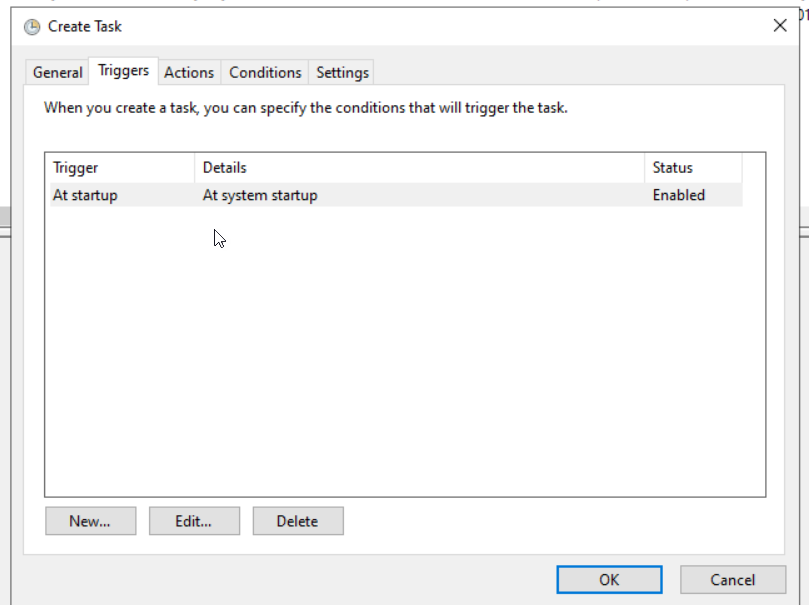
On the Triggers tab, add a new trigger with New. Select At startup as Begin the task. The task starts automatically every time the server boots.
Step 5 — Conditions Settings
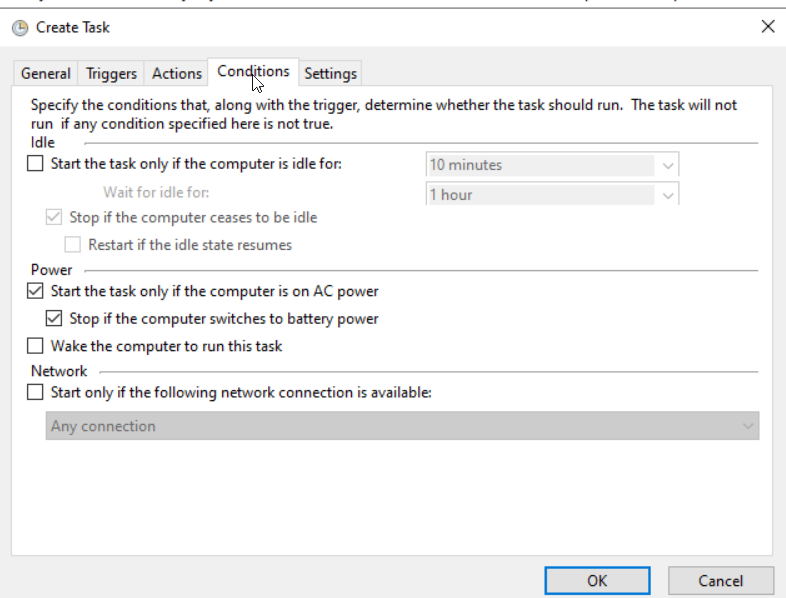
On the Conditions tab, use the settings appropriate for the server:
- Start the task only if the computer is on AC power ✅
- Start the task only if the computer is idle ❌ (must not be checked — the Worker should run without waiting for the machine to be idle)
Step 6 — Settings Configuration
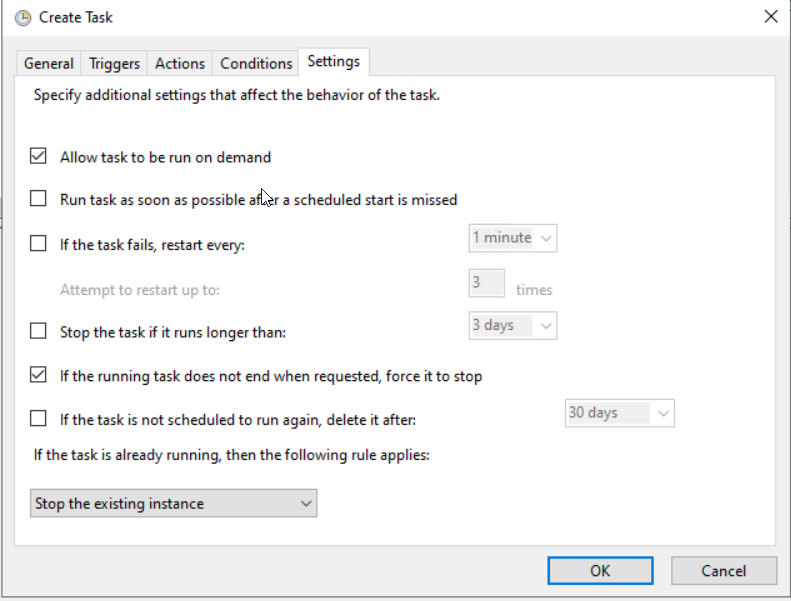
On the Settings tab, the following options should be active:
- Allow task to be run on demand ✅
- If the running task does not end when requested, force it to stop ✅
- If the task is already running → Stop the existing instance
Step 7 — Running the Task
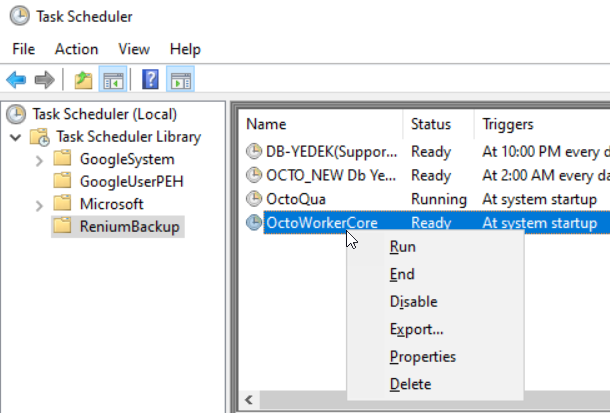
After the task is created, it is listed under the Renium folder. Start it manually via right-click → Run on the task. The Status field should be Running. (When needed, it can be stopped with End and disabled with Disable.)
Step 8 — .NET Runtime Installation
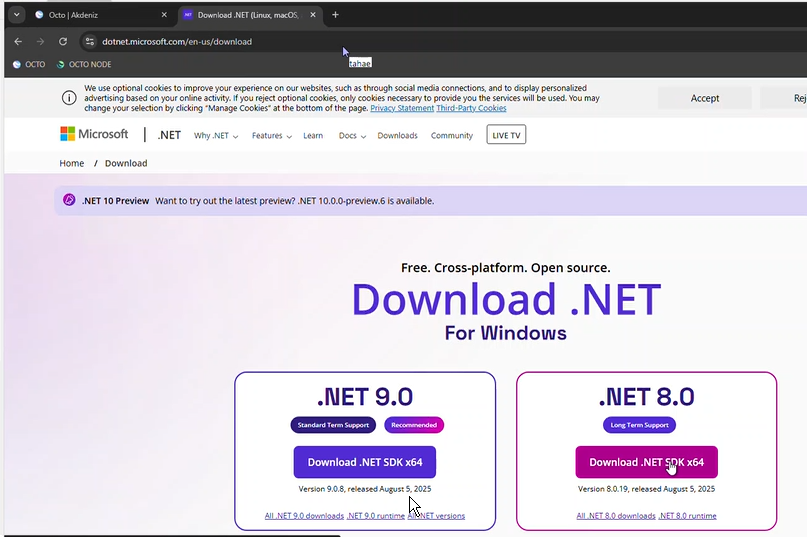
If the required .NET version is not installed on the server, download and install the relevant .NET SDK x64 version (the version the Worker was built with — e.g. 8.0 LTS) from dotnet.microsoft.com/download.
Step 9 — Checking Mail Settings in the Database
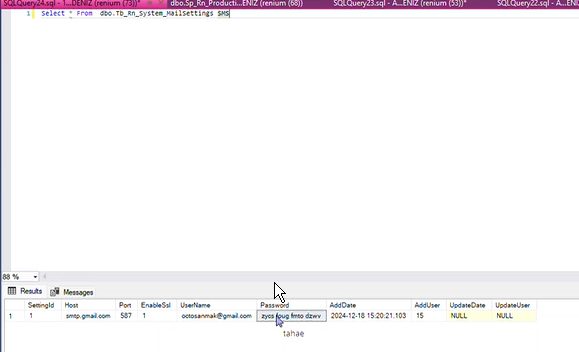
For error notification emails, check the Tb_Rn_System_MailSettings table in the Octo database or the resend settings. Make sure the SMTP Host, Port, EnableSsl, UserName, and Password fields are filled in.
SELECT * FROM dbo.Tb_Rn_System_MailSettings;
If Gmail is used, an App Password generated from the Google account must be entered in the SMTP Password field; the user's normal password will not work.
Step 10 — Service Verification (Event Viewer)
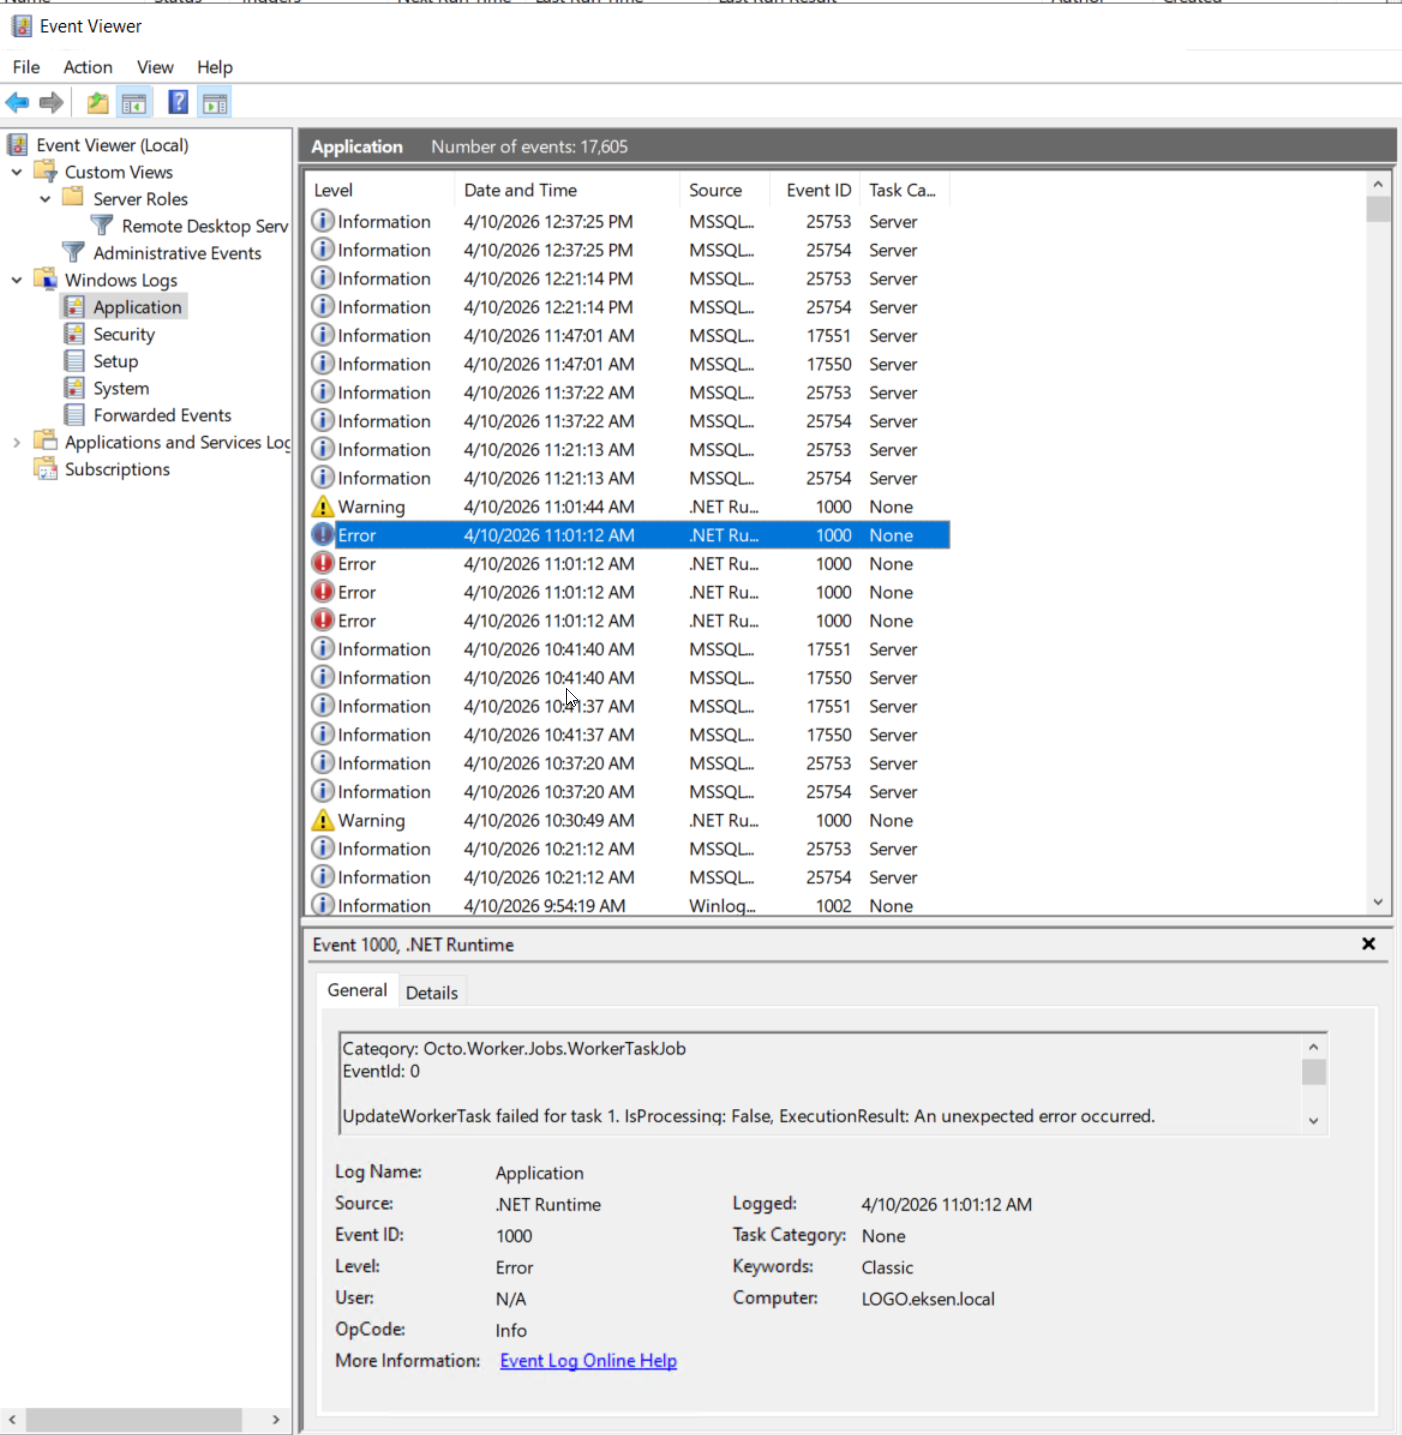
Under Event Viewer → Windows Logs → Application, records whose Source field is .NET Runtime indicate that the Worker is active. If there are records at the Error level (e.g. UpdateWorkerTask failed), examine their details.
Step 11 — Log Checking via the Console
Run the C:\OctoWorker\Octo.Worker.exe file in console mode by double-clicking it. The live log stream (info, fail messages) is followed from here; you can perform the first verification here without needing Task Scheduler.
In console mode, if you close the window the Worker stops. For it to run continuously, the Task Scheduler task must be active.
Troubleshooting
If the Worker is not running or is giving errors:
- Check the service status via Windows Services.
- Look at the current log file under the
logs/folder. - Make sure the
ConnectionNamevalue inappsettings.jsonis defined in Octo connection management. - If
ErrorNotification.Enabled = true, monitor the error emails arriving in the recipient list.
This documentation is continuously updated. For installation-specific details or error situations, contact your system administrator.