Screens
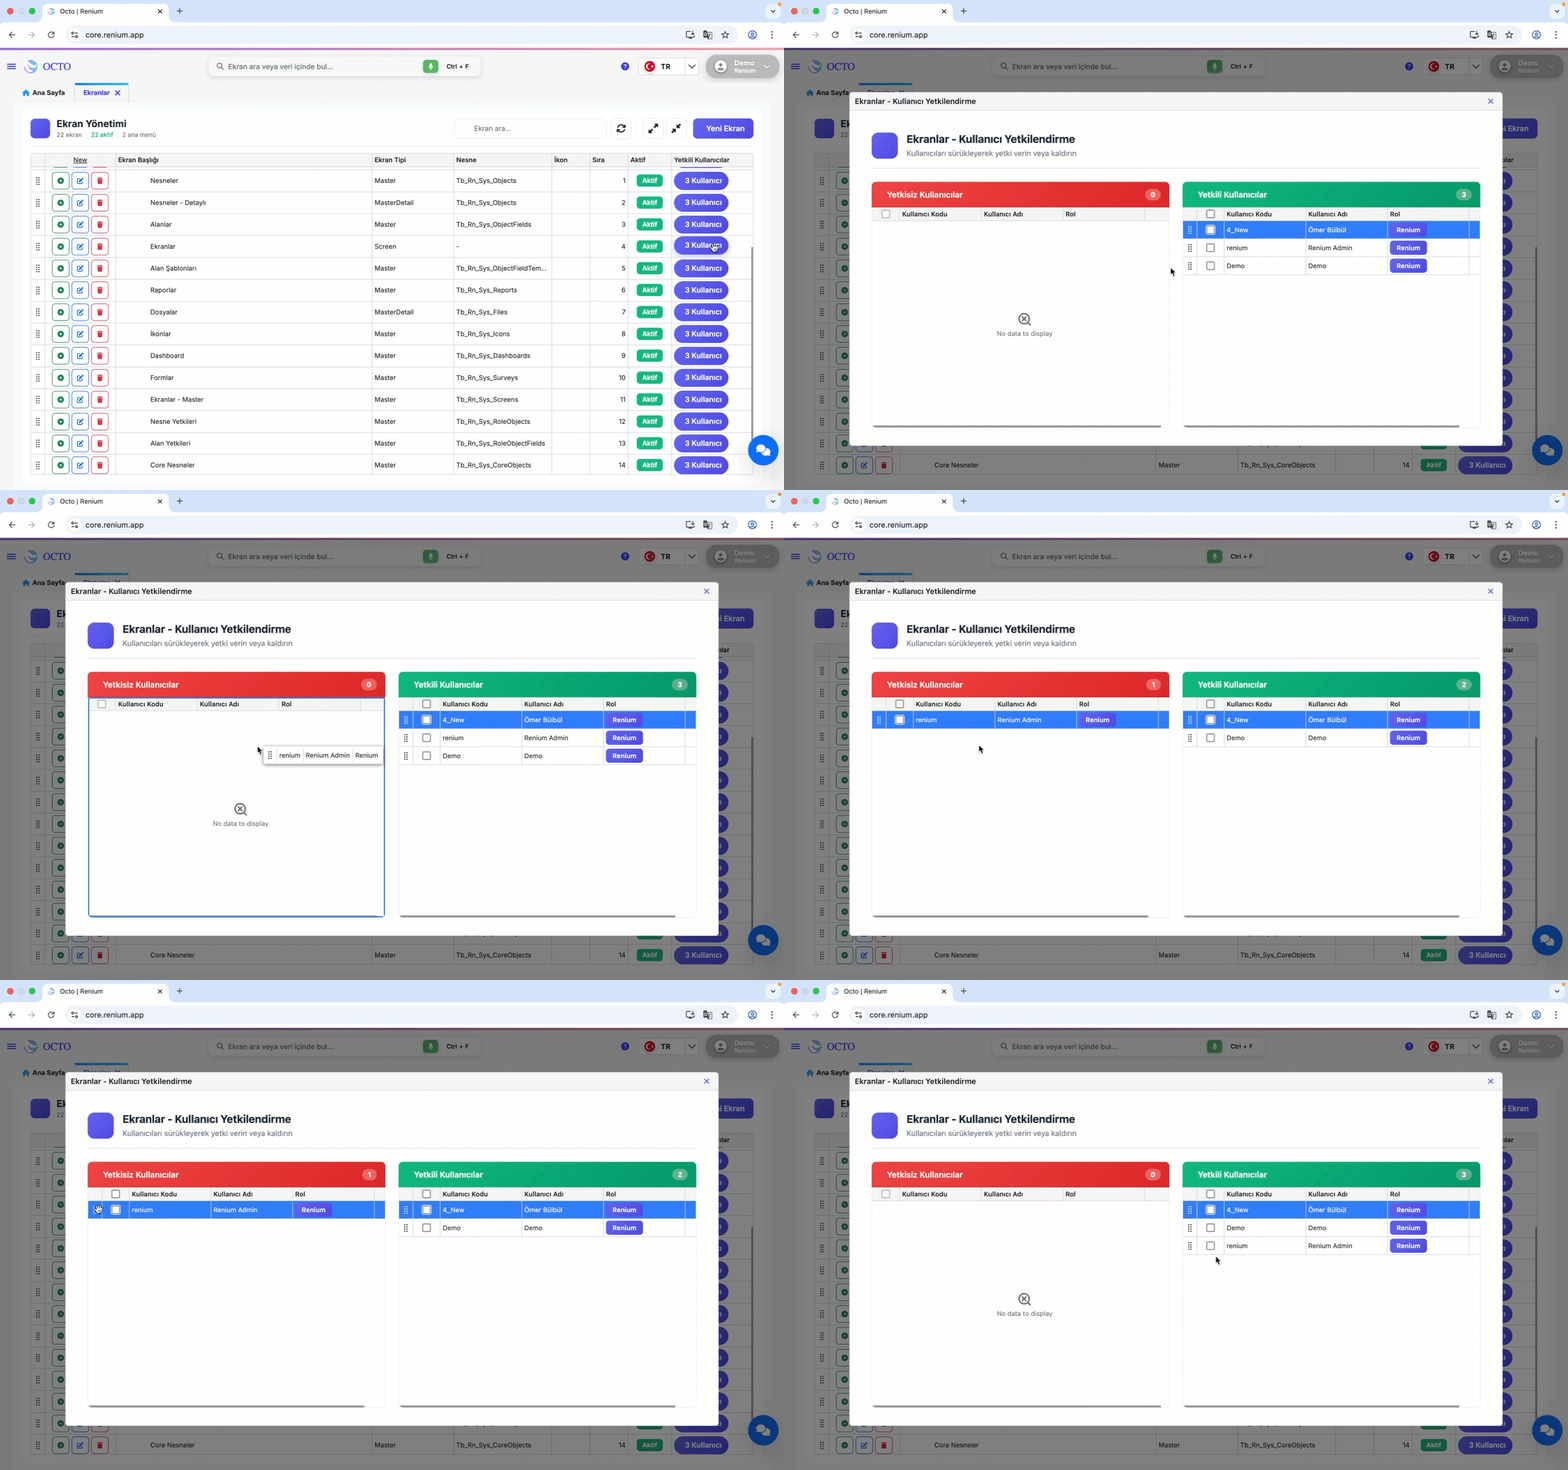
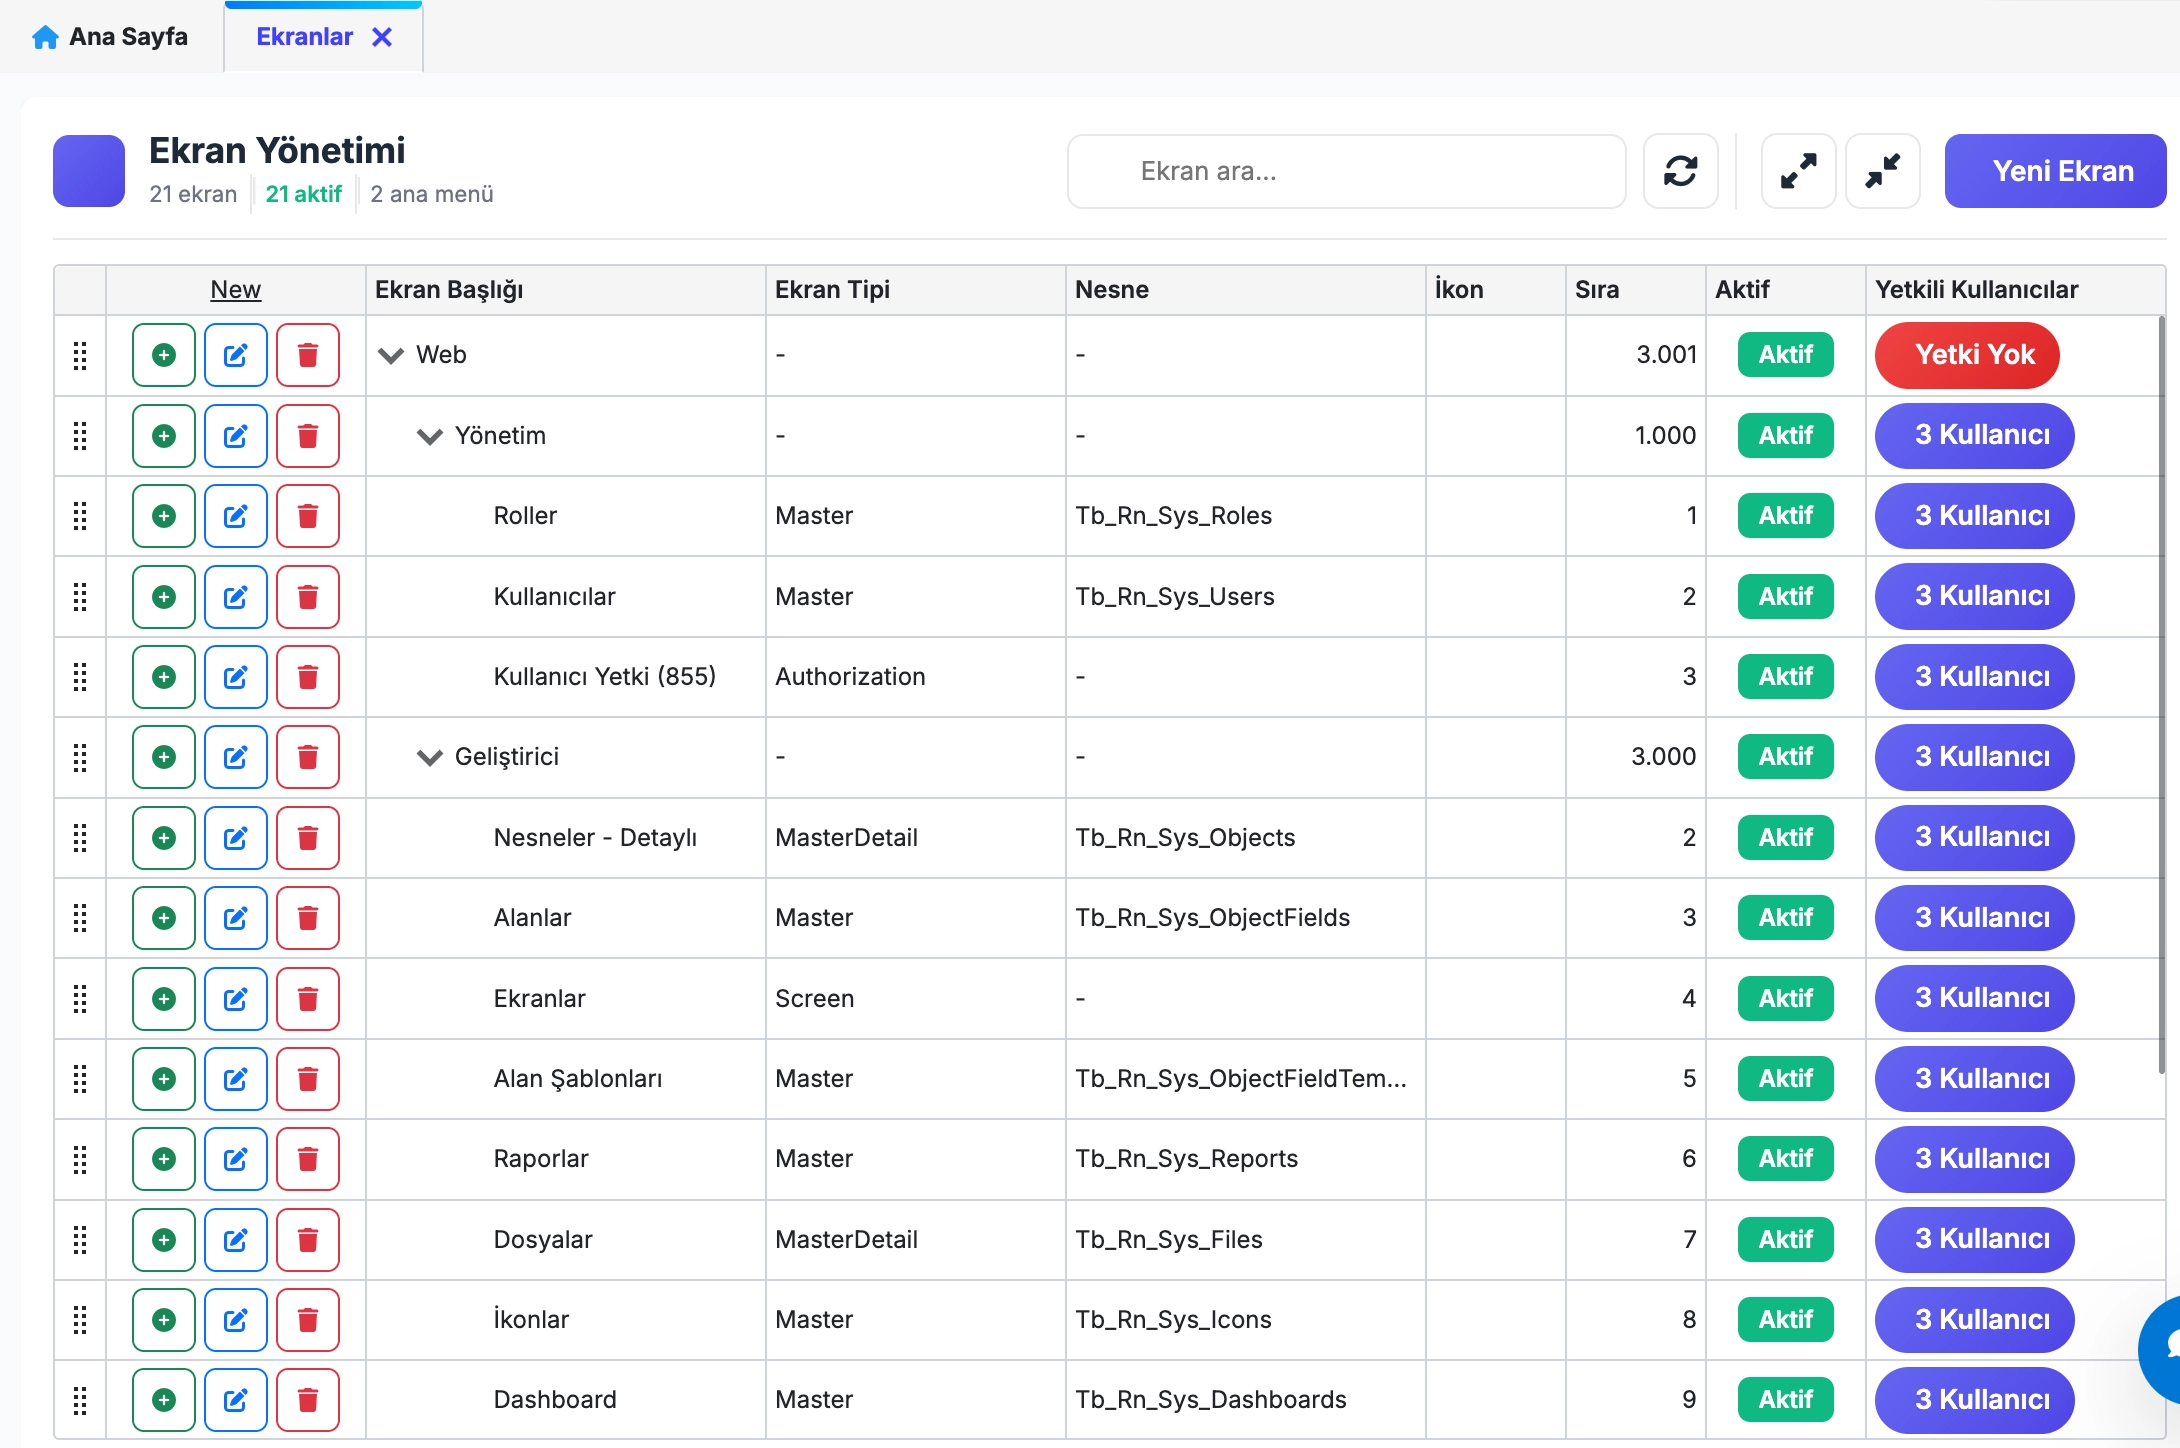
The Screens page hierarchically lists the screens and parent screens defined in the system, and allows you to manage these screens and parent screens from here. On this page you can;
- Create new screens,
- Make permission changes on existing screens,
- Delete screens that are no longer needed.
All screen management and configuration operations are carried out from this area.
Creating a New Screen
To define a new screen, click the New Screen button in the top right to open the New Screen Creation form. This form is used to determine the screen's structure, hierarchy, and behavior.
-
Screen Title
Refers to the name that will appear system-wide for the screen. -
Parent Screen
Specifies which parent screen the screen to be created will be located under within the hierarchical structure. -
Screen Type
Screen Types are screen kinds defined in the system for different needs. The selected Screen Type determines both the visual structure and the functional behavior of the screen. The properties the screen will have are created automatically based on the selected screen type.
-
MainMenuIt is the screen type that represents the main menu structure of the system.
The title defined for this screen is displayed as the section name in the top menu.
It is generally recommended to use the project or organization name in this area.
-
AuthorizationIt is the screen type where authorization and access management is performed system-wide.
Users, roles, and access permissions are defined and managed through this screen.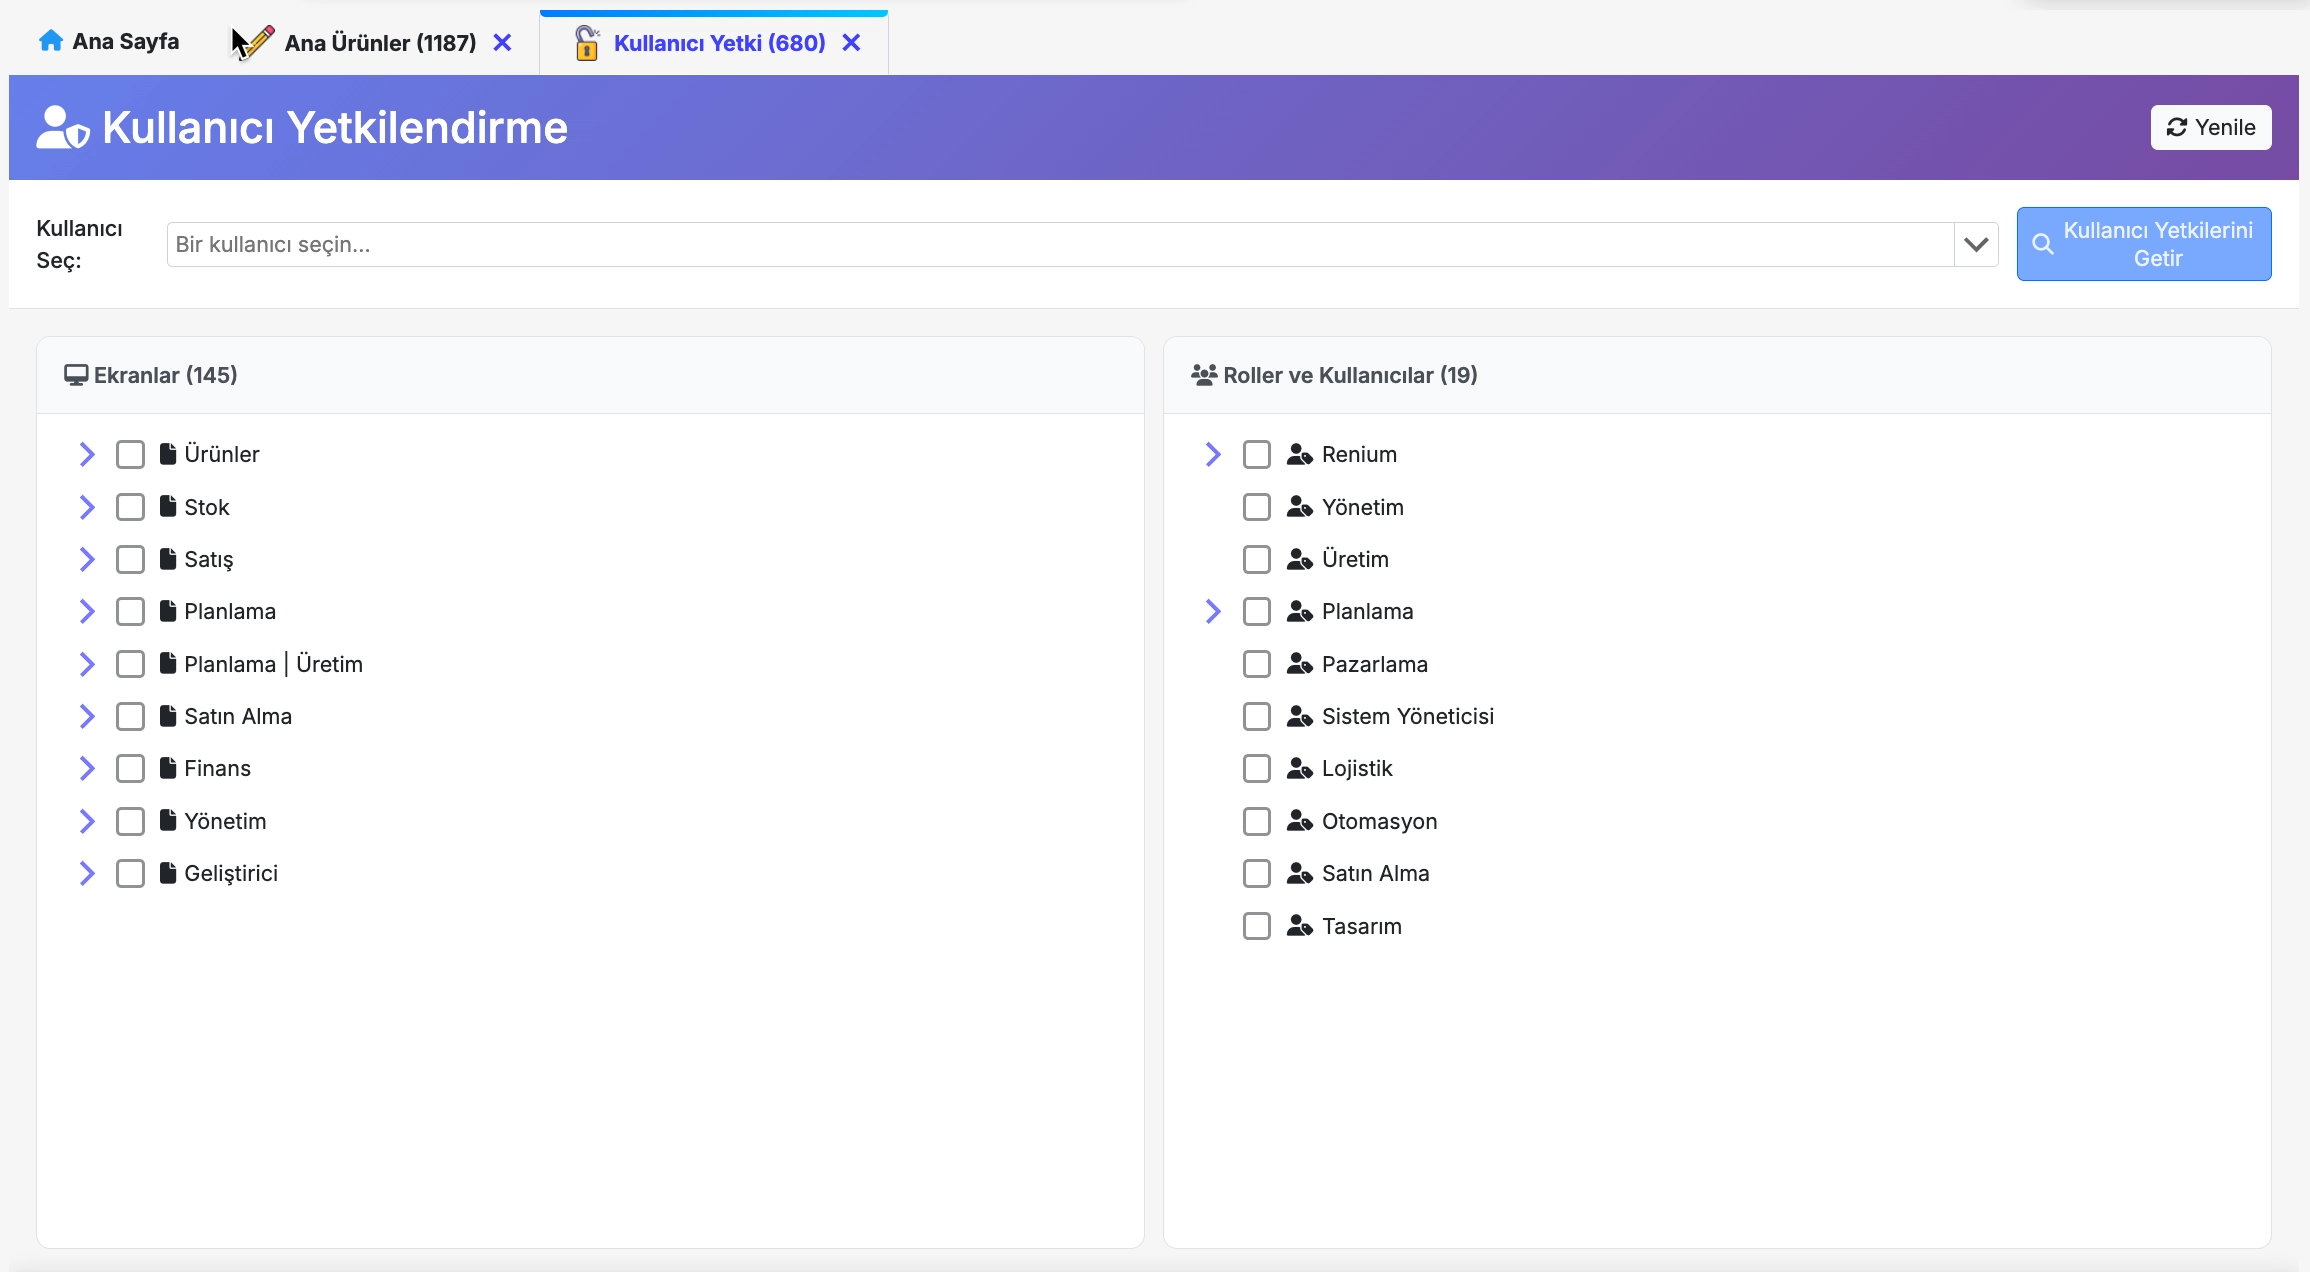
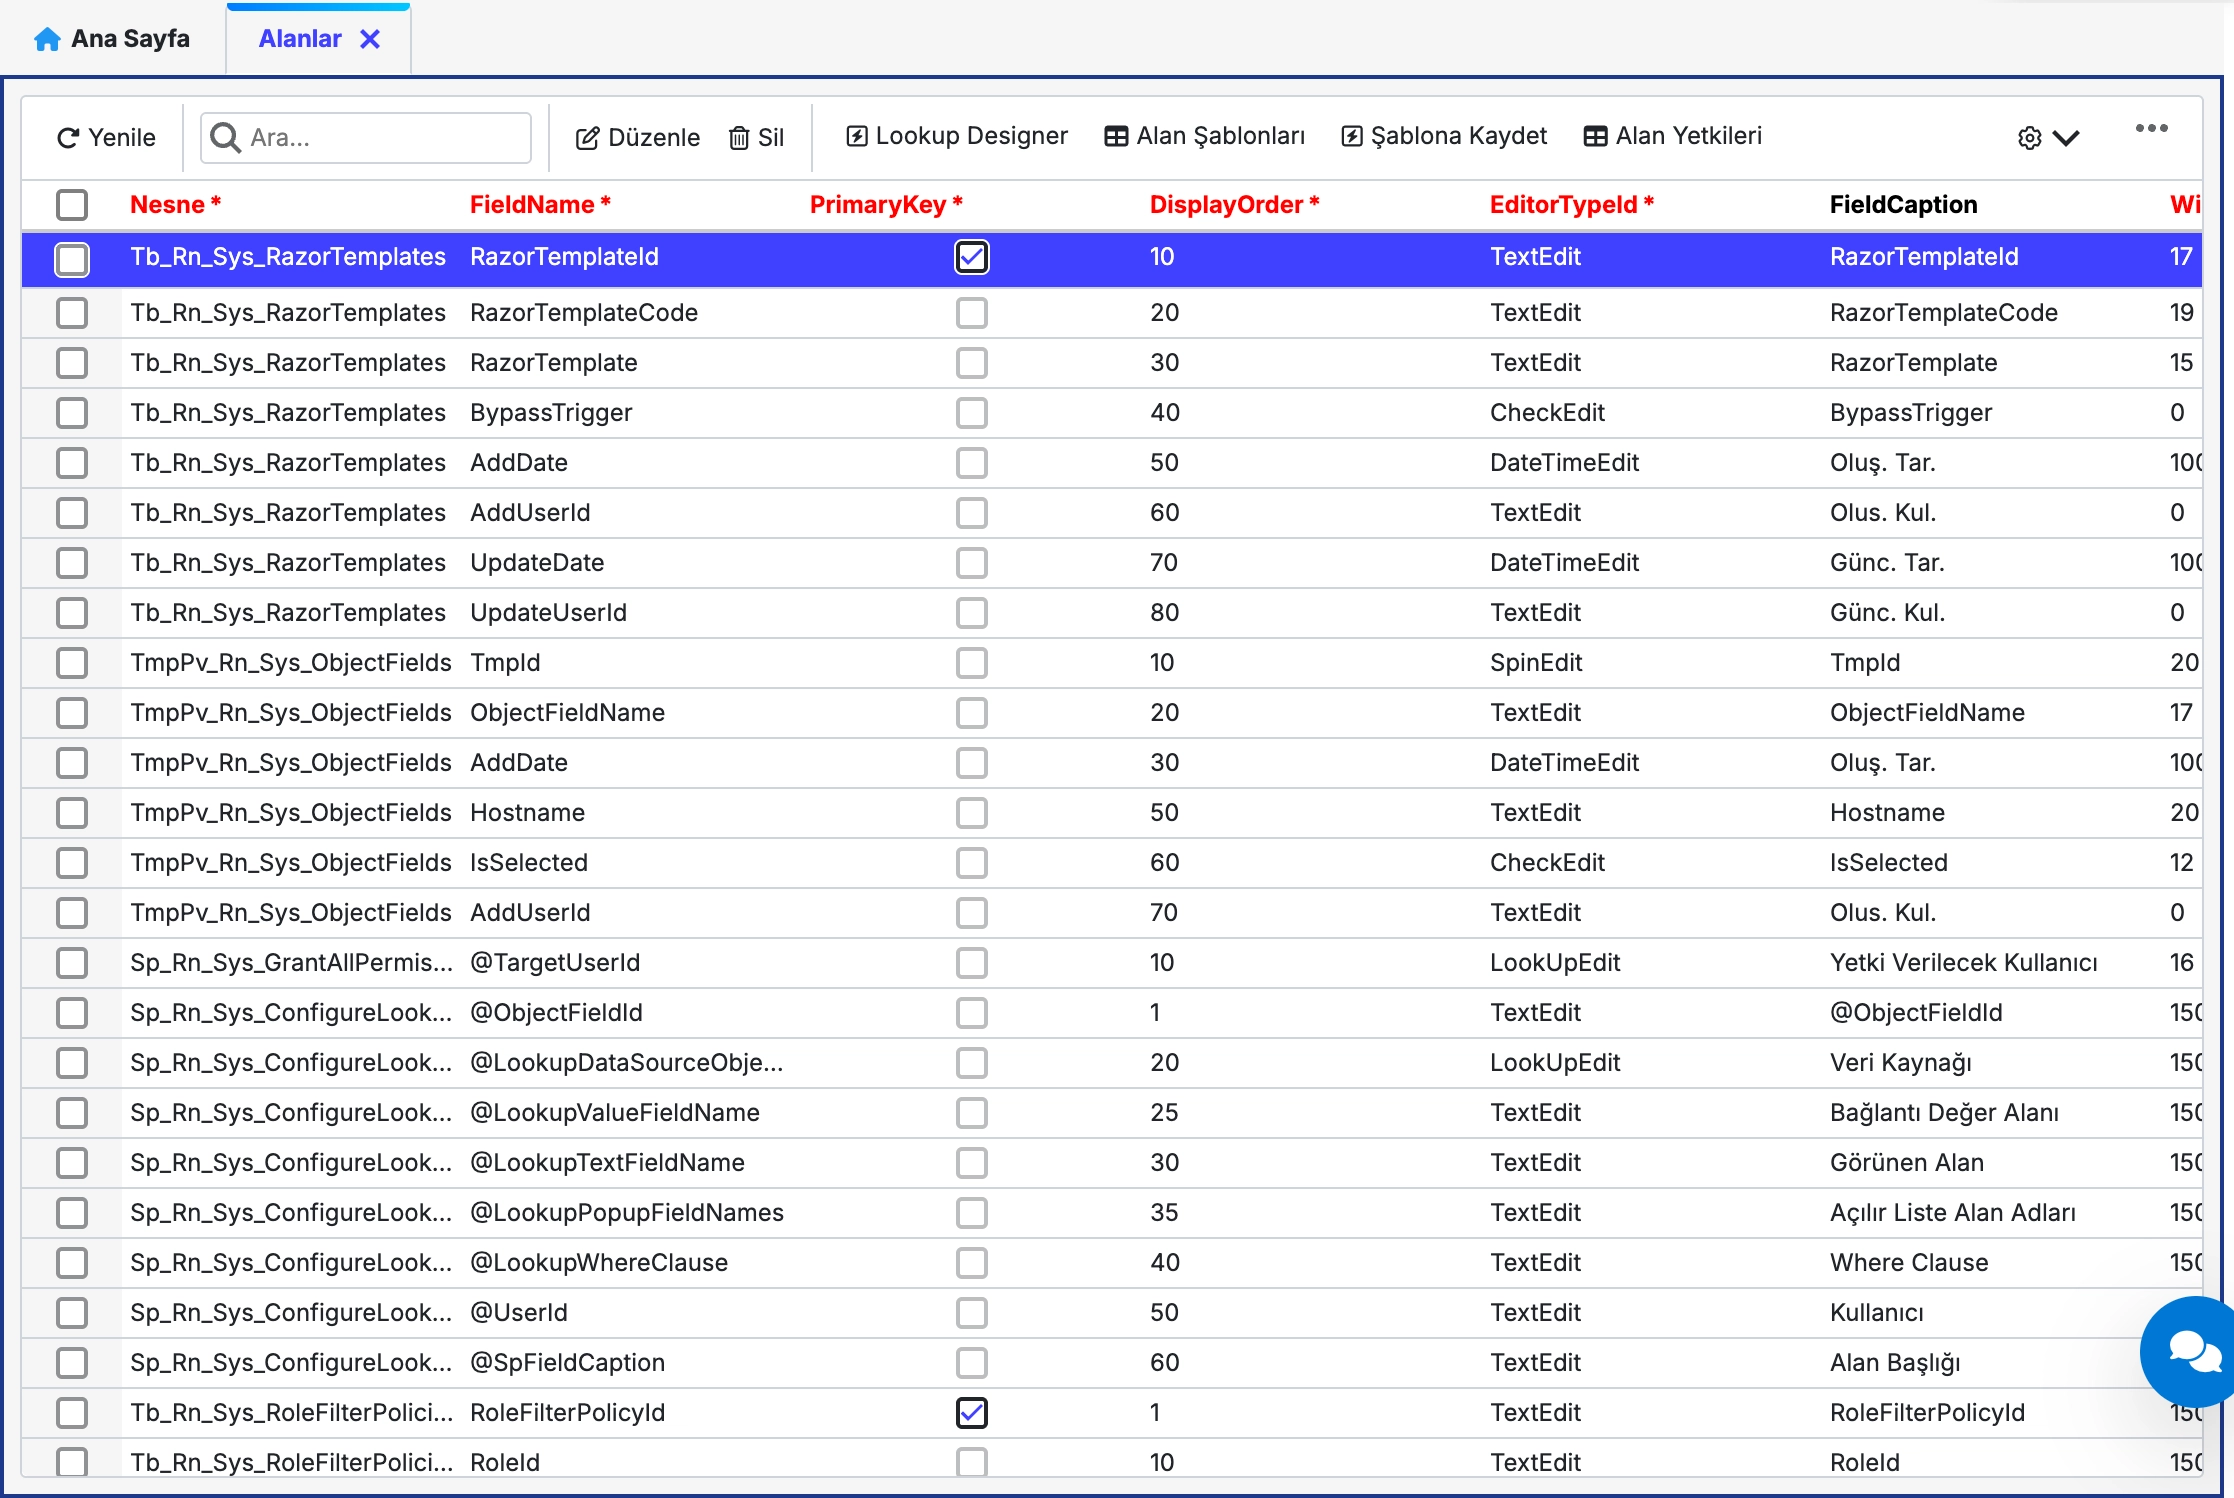
Master
Screens created in Master type work without tabs. Even if there are tab definitions belonging to the MasterDetail structure on the object, these tabs do not open on the screen. The screen is displayed as only a single main (master) screen.
-
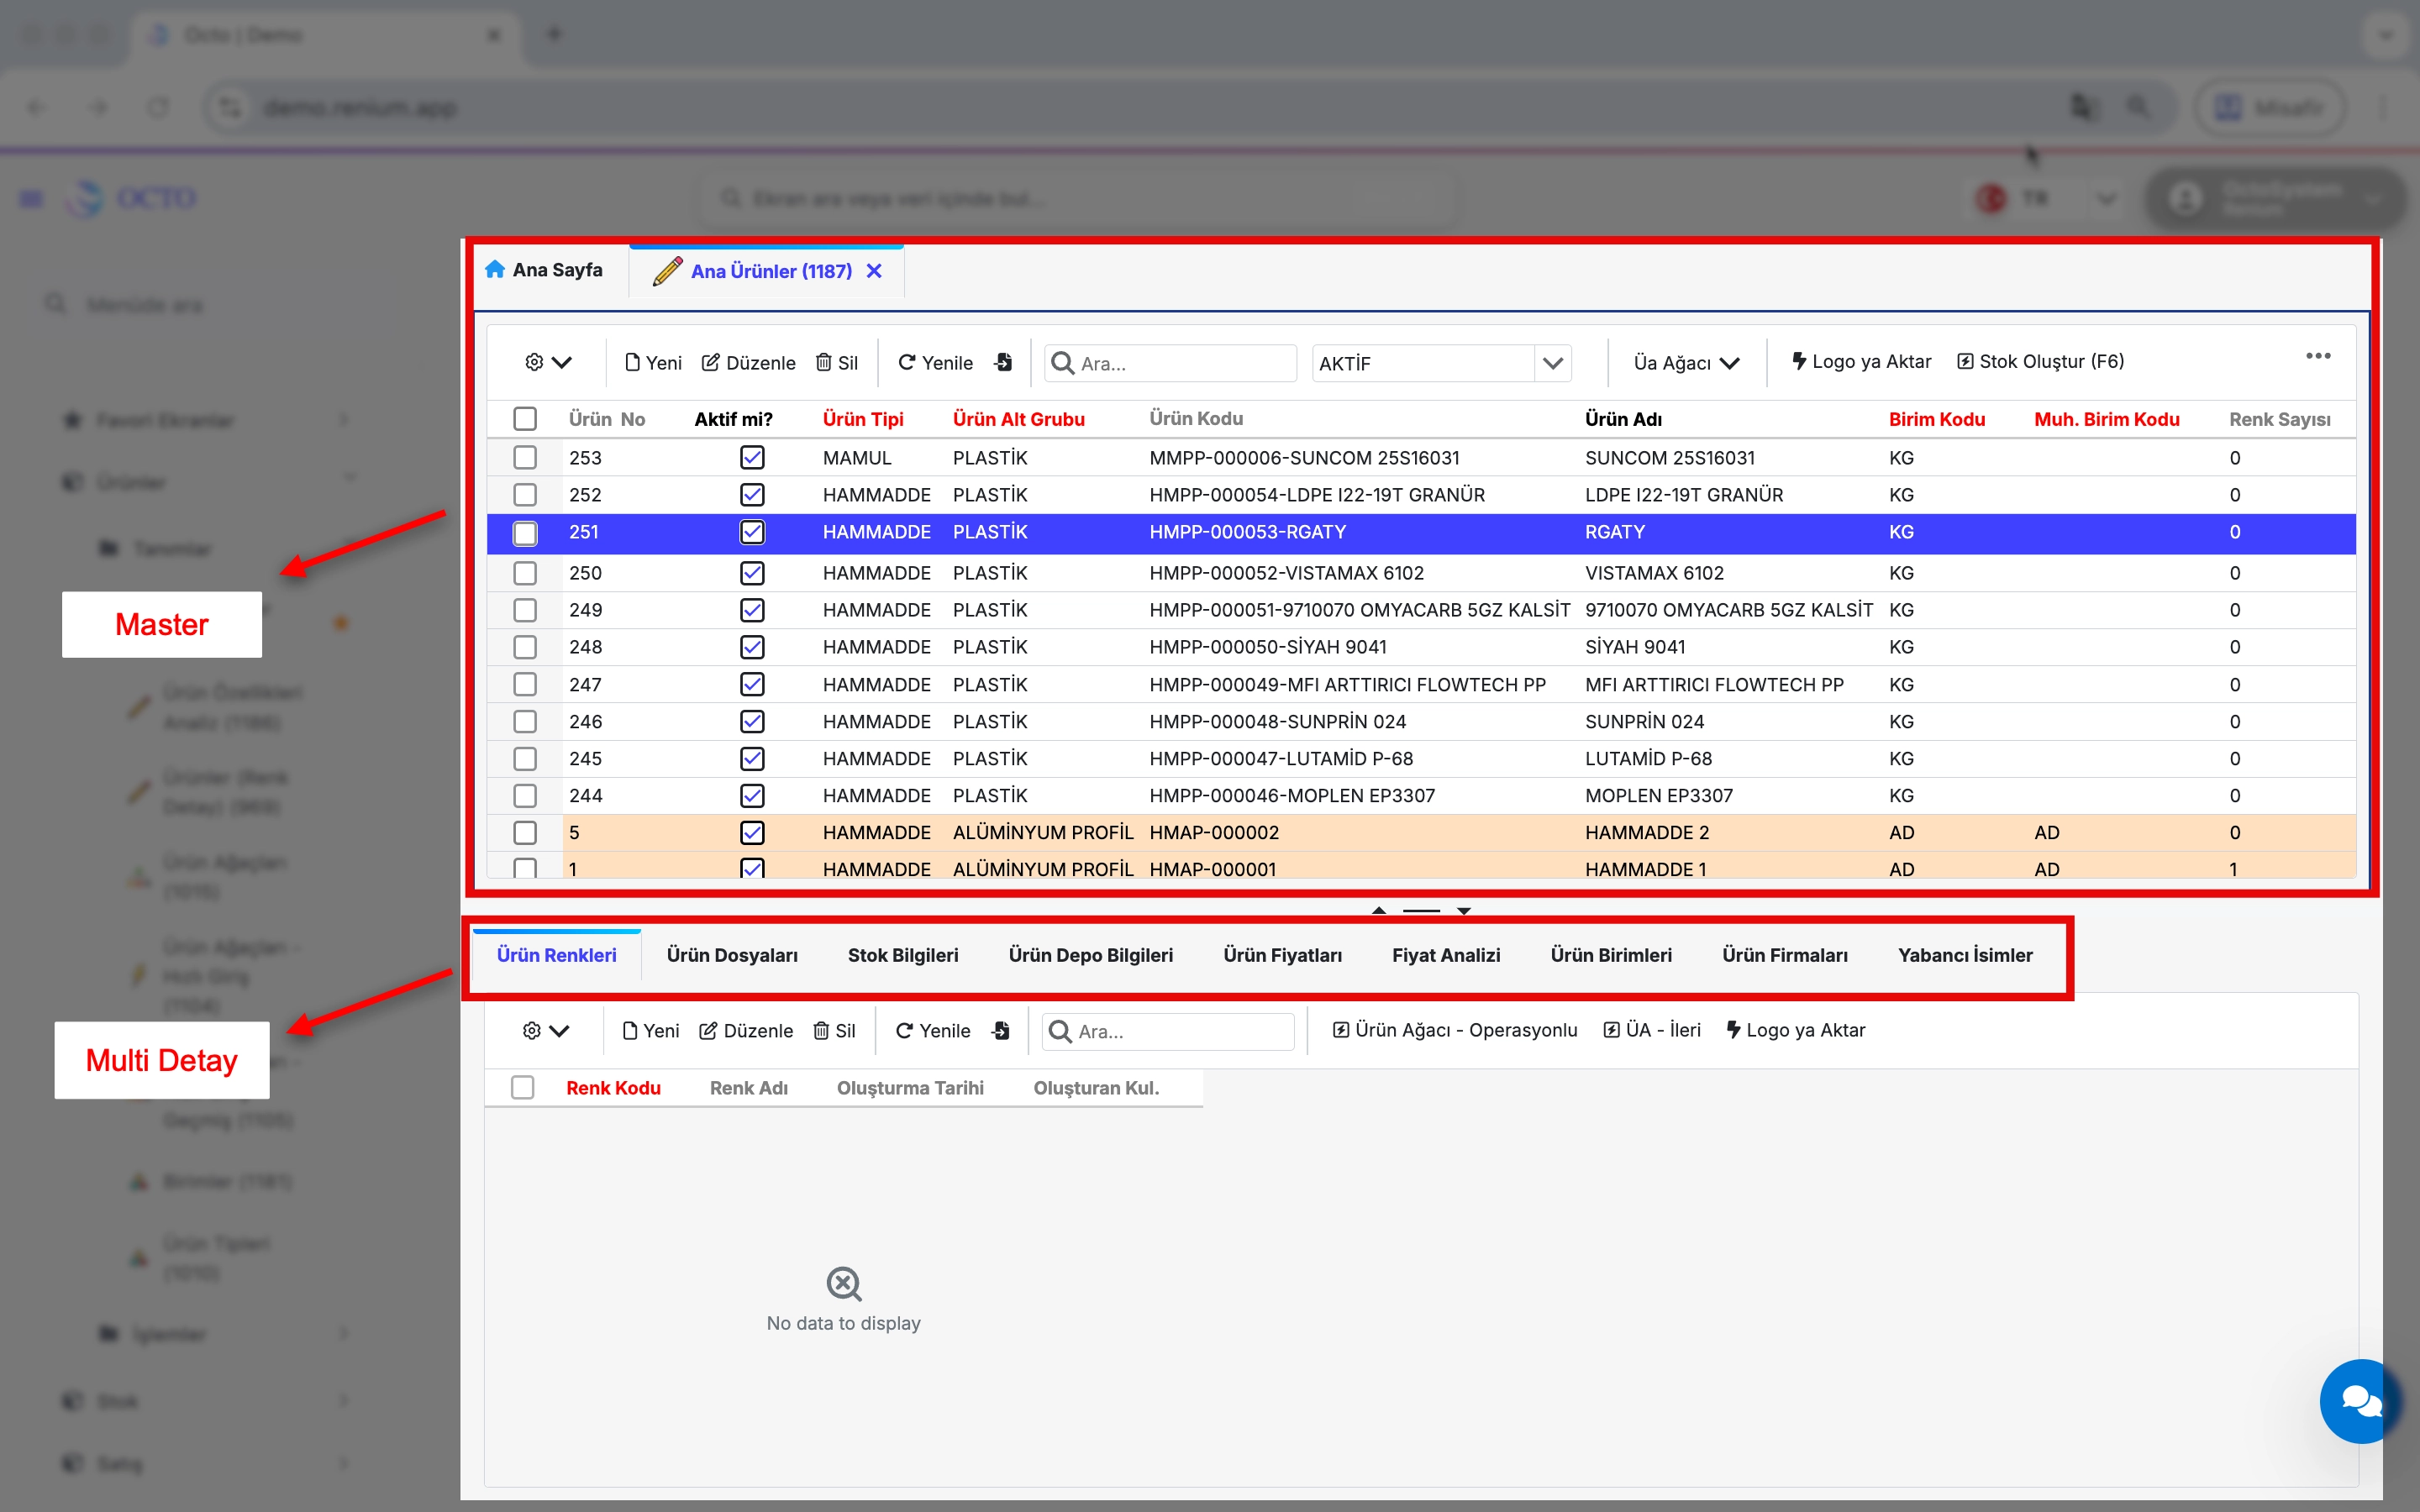
MasterDetailRepresents the Master–Multi Detail screen structure.
These are structures where a Master screen and one or more Detail screens work together.
It is used to display and manage detail information linked to a main record.Example: Main Products screen
Report
Dashboard
SurveyManager
Screen
A screen created in Screen type actually directly represents the 'Screens' screen. This structure will create a new screen.
-
Order Determines in which order the screen will be displayed within the relevant module.
-
Active Inactive screens are not displayed in the menu. For the screen to be active, the relevant checkbox must be checked.
-
Object The Object field specifies which data object (table or view) the relevant screen will work with. Thanks to this field, the relationship between the screen and the database is established, and it is determined which data will be listed, edited, or have its details displayed on the screen.
The fields specified above are mandatory fields that must be defined for all screen types.
Validation and Warnings
When you save a screen, the system checks whether the screen definition is consistent. If it finds a problem, it issues a warning; in critical cases, saving is blocked. Common warnings:
| Warning | Meaning | Solution |
|---|---|---|
| Screen Type not selected / invalid | The visual and functional behavior of the screen cannot be determined | Select a valid Screen Type |
| Object not selected / invalid | Master and MasterDetail screens must be linked to a data object | Select a valid table/view in the Object field |
| Problem in the linked object | There is a warning in the definition of the object the screen uses | Check and refresh the relevant object from the Objects screen |
| No detail for MasterDetail | A MasterDetail screen must have at least one sub (detail) screen defined | Define at least one detail from the object's Details tab |
| Filter (Where) expression is incorrect | The condition applied to the screen is invalid | Fix the syntax of the expression |
| No authorized user assigned | No user can see the screen | Add at least one user from Authorized Users |
Screen changes may not appear immediately in the browser — the menu and screen structure are cached when the page opens. To reflect the changes, refresh the browser tab (F5).
Screen Authorization Operations
You can use the Authorized Users column to edit and organize the permissions belonging to screens.
To make a permission edit, click the button located in the Authorized Users column of the relevant screen.
In the Authorization screen that opens;
- Authorized users
- Unauthorized users
are displayed as two separate lists.
To remove a user's permission or add a new permission, simply move the user to the authorized or unauthorized list using the drag-and-drop method with the cursor next to the relevant user.